On This Page
Create a P12 Certificate
This section describes how to create or submit a P12 certificate, extract the certificate's
private key
, and test the private key to verify that it works. A private key
is necessary for you to construct JSON Web Tokens (JWTs). You can choose to create or submit a P12 certificate.
Create
a P12 certificate if
you need a new certificate. Submit
a P12 certificate if you want to use your own
certificate.- (Optional) Meta Keys
- If you are using a portfolio or merchant account, you have the option to create ameta keyof a P12 certificate. Meta keys enable an organization administrator to assign a single P12 certificate to some or all transacting merchants in their organization. The purpose of a meta key is to reduce the time needed to manage an organization's keys. For example, by assigning the same meta key to all of your transacting merchants, you only need to update one key when it expires instead of having to update each transacting merchant's key.
- For more information about meta keys, see the Meta Key Creation and Management section in theCreating and Using Security Keys User Guide.
Step 2A: Creating or Submitting a P12 Certificate
Follow these steps to create a P12 certificate file or submit your own certificate
signing request (CSR):
- Log in to theBusiness Center:
- On the left navigation panel, choose
 Payment Configuration > Key Management.
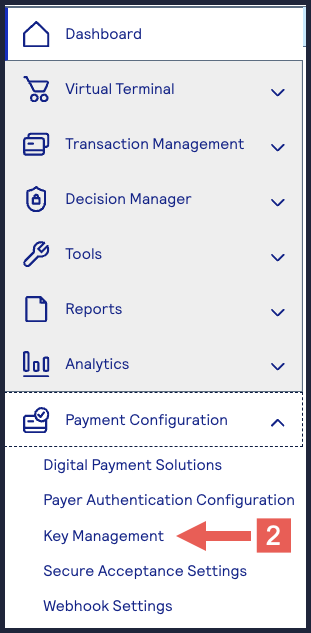
- Click+ Generate keyon the Key Management page.
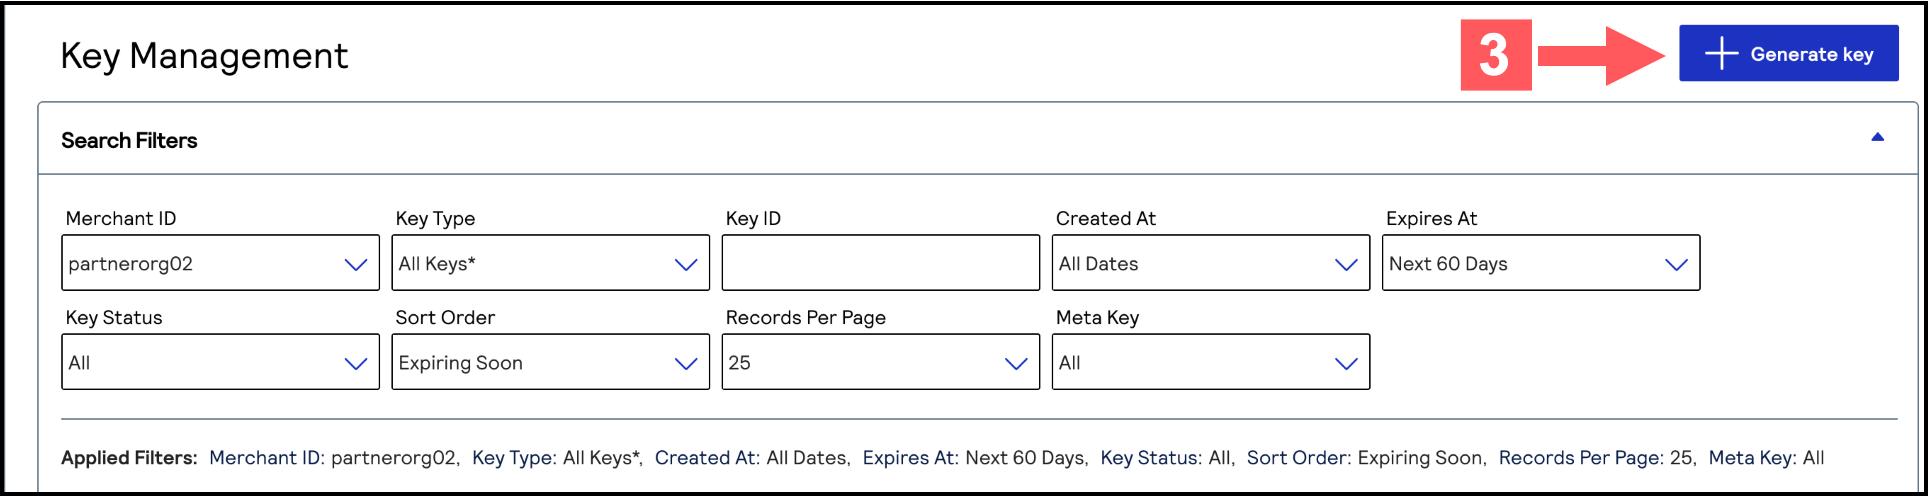
- Under REST APIs, chooseREST – Certificate, and then clickGenerate key.The Key Generation page appears.If you are using aportfolioaccount, the Key options window appears, giving you the choice to create a meta key.For more information about how to create a meta key, see .
- (Optional) You can set the Certificate Expiry Timeframe field to the number of months you want the key to remain active before it expires. Only whole numbers from 1–36 are accepted. By default, new keys expire after 12 months.
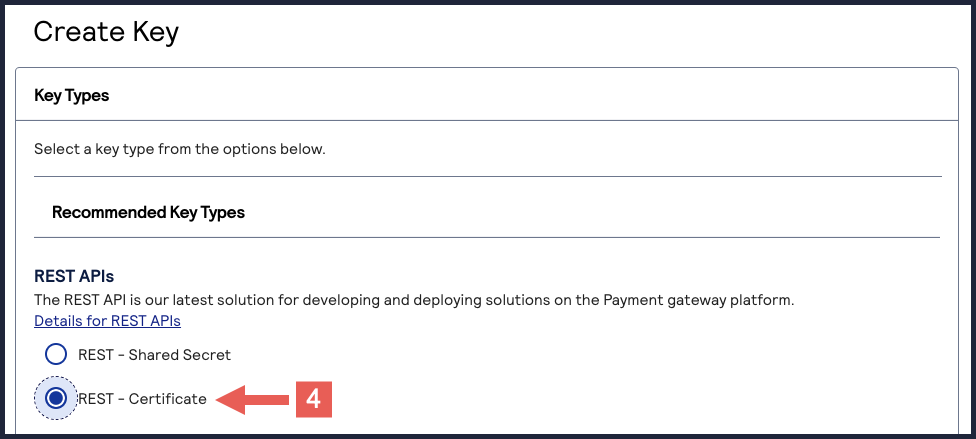
- Choose from these two options:
- If you are a creating a new P12 Certificate, clickDownload key
 .
.
- If you are submitting your own certificate, enter your public PEM-formatted certificate in the text box, then clickDownload key
.
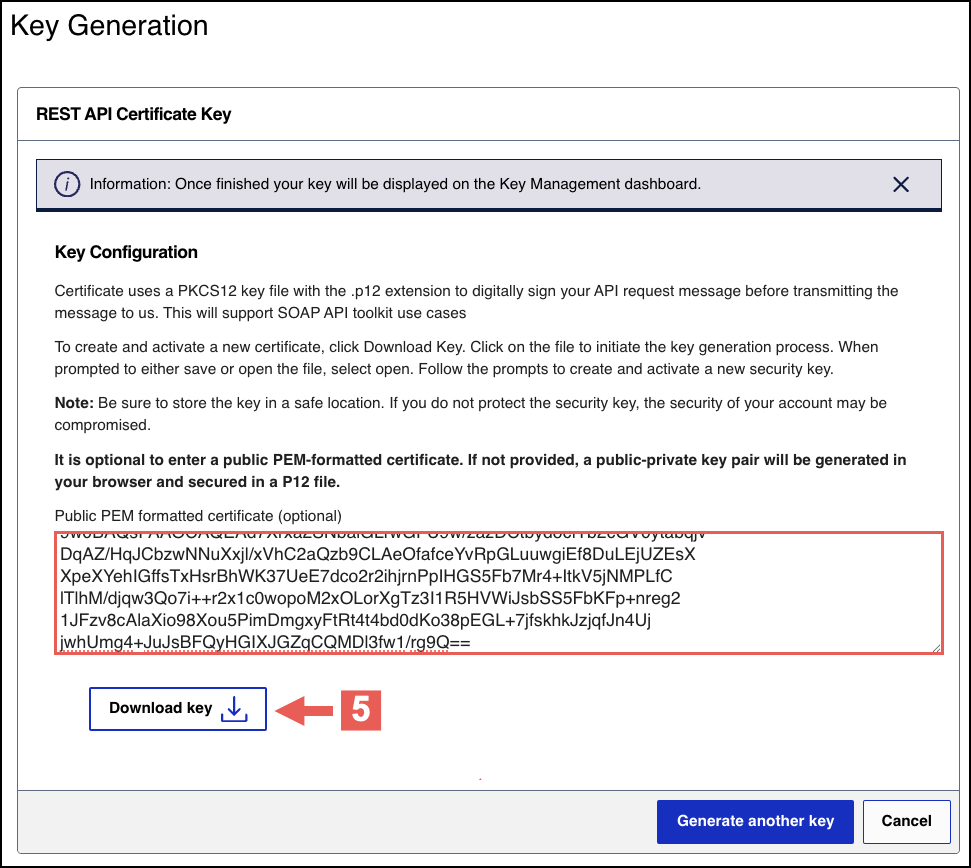
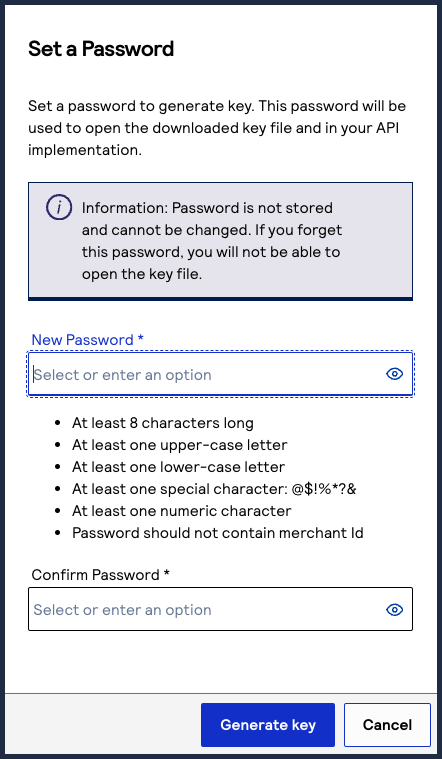
- Create a password for the certificate by entering one into theNew PasswordandConfirm Passwordfields. ClickGenerate key.
 The.p12file downloads to your desktop.If prompted by your system, approve the location to which the key downloads.
To create or submit another key, click
Generate another key
. To view all of
your created keys, go to the Key Management page.IMPORTANT
Securely store the
.p12
file and password in your system. These
credentials are required in order to implement certain products, and you must be
able to access them.Step 2B: Testing Your Private Key
After creating your key certificate, you must verify that it can successfully process
API requests. This task explains how to test and validate your private key in the
Developer Center and the
Business Center
.Follow these steps:
- Go to the Developer Center's API Reference page:
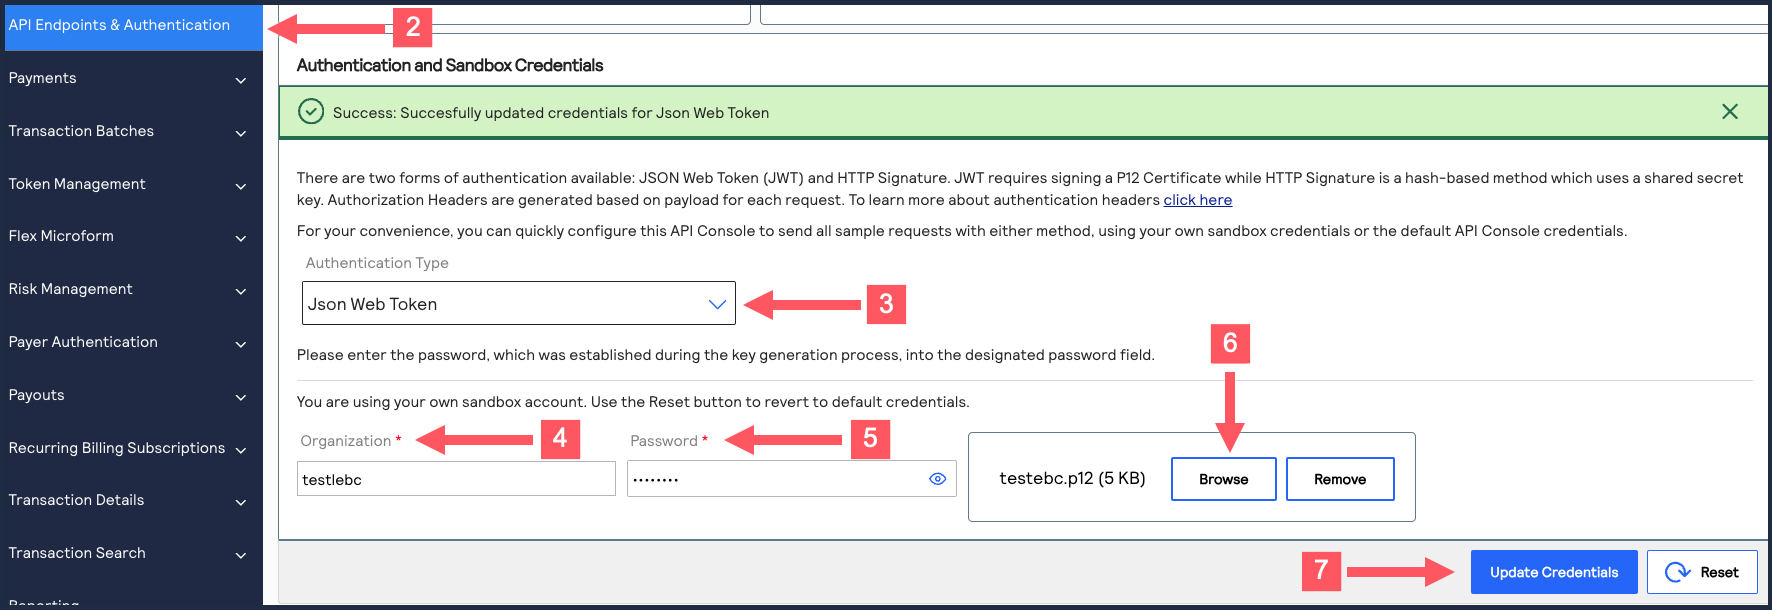
- On the left navigation panel, click .
- Under Authentication and Sandbox Credentials, go to the Authentication Type drop-down menu and chooseJSON Web Token.
- Enter your organization ID in theOrganizationfield.
- Enter your Password in thePasswordfield.
- ClickBrowseand upload your p12 certificate from your desktop.
- ClickUpdate Credentials.A confirmation message states that your credentials are successfully updated.
- Go to the Developer Center's API Reference and navigate toPayments >.POSTProcess a Payment
- ClickSend.
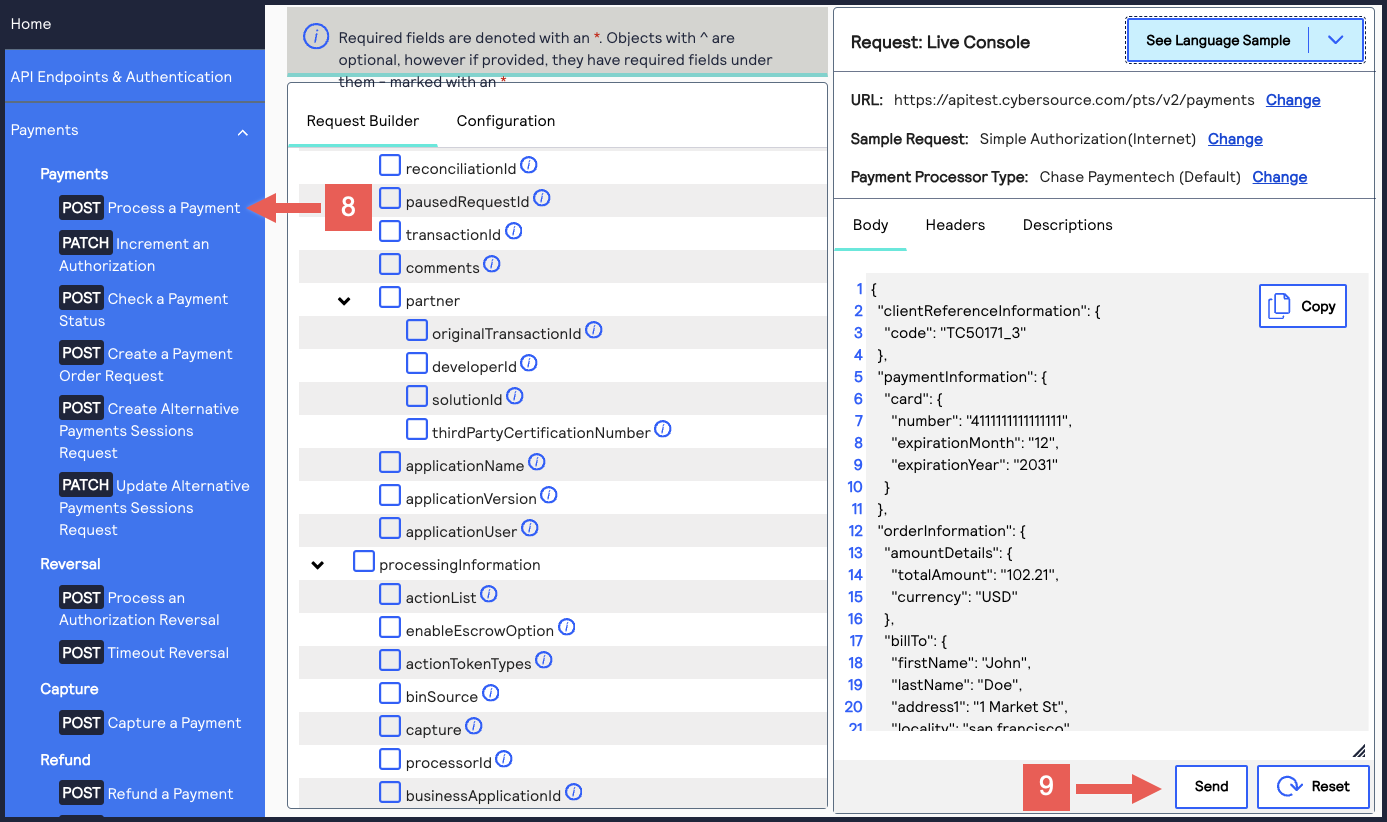 A message confirms that your request was successful with the status code 201.
- Log in to theBusiness Center:
- On the left navigation panel, choose
 Transaction Management > Transactions.
 - Under Search Results, verify that the request ID from the test authorization response is listed in the Request ID column.If the test authorization was successful, a success message is present in the corresponding Applications column.
