FILTER BY TAG

Enable an Ethernet Proxy IP Connection on the PAX Terminal

To enable an Ethernet IP connection, use an Ethernet cable to connect your PAX A35 terminal to your point-of-sale (POS) system. For more information, see Connect the Ethernet Cable to the PAX Terminal.
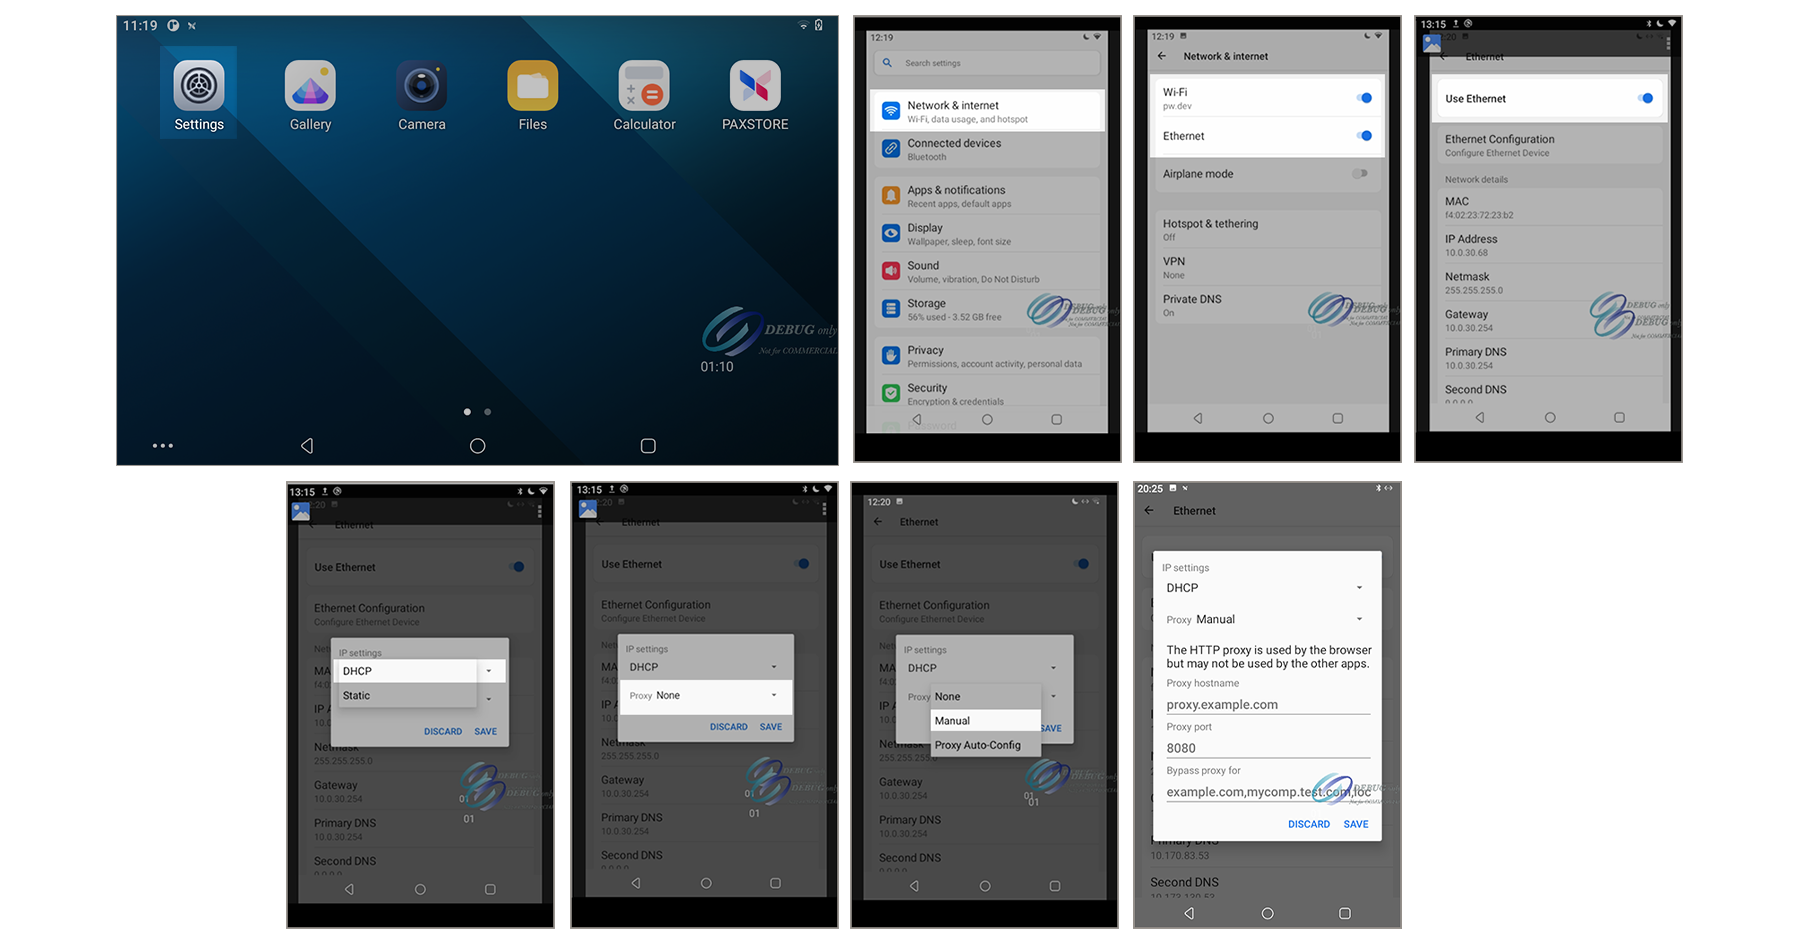
Figure:

Settings Menu Screens Used to Enable an Ethernet Proxy IP Connection on PAX Terminal
Settings Menu Screens Used to Enable an Ethernet Proxy IP Connection on PAX
                        Terminal
Follow these steps to enable the Ethernet proxy IP connection on the PAX terminal.
  1. On the terminal Home screen, tap the
    Settings
    icon. Enter your password. The Setting screen appears. If you have not created a custom password, see Create a Password for the PAX Terminal Settings Menu.
  2. Tap
    Network & internet
    .
  3. In the
    Ethernet
    section, tap the toggle to turn on Ethernet.
  4. Tap the
    Ethernet
    icon. The Ethernet network connection settings screen appears.
  5. Scroll down and then tap
    Ethernet Configuration
    . A pop-up menu appears.
  6. Choose
    DHCP
    .
  7. Click the Proxy drop-down menu arrow.
  8. Choose
    Manual
    . A screen appears with fields in which you will enter this information:

    ADDITIONAL INFORMATION

    • Proxy hostname
      field: Enter the proxy URL.
    • Proxy port
      field: Enter the 4-digit proxy port number.
    • Bypass proxy
      field: Enter safelist URLs that are allowed to bypass the proxy. This field is optional.
  9. Tap
    Save
    .
  10. To exit the screen, tap the back arrow until you reach the Home screen.