FILTER BY TAG

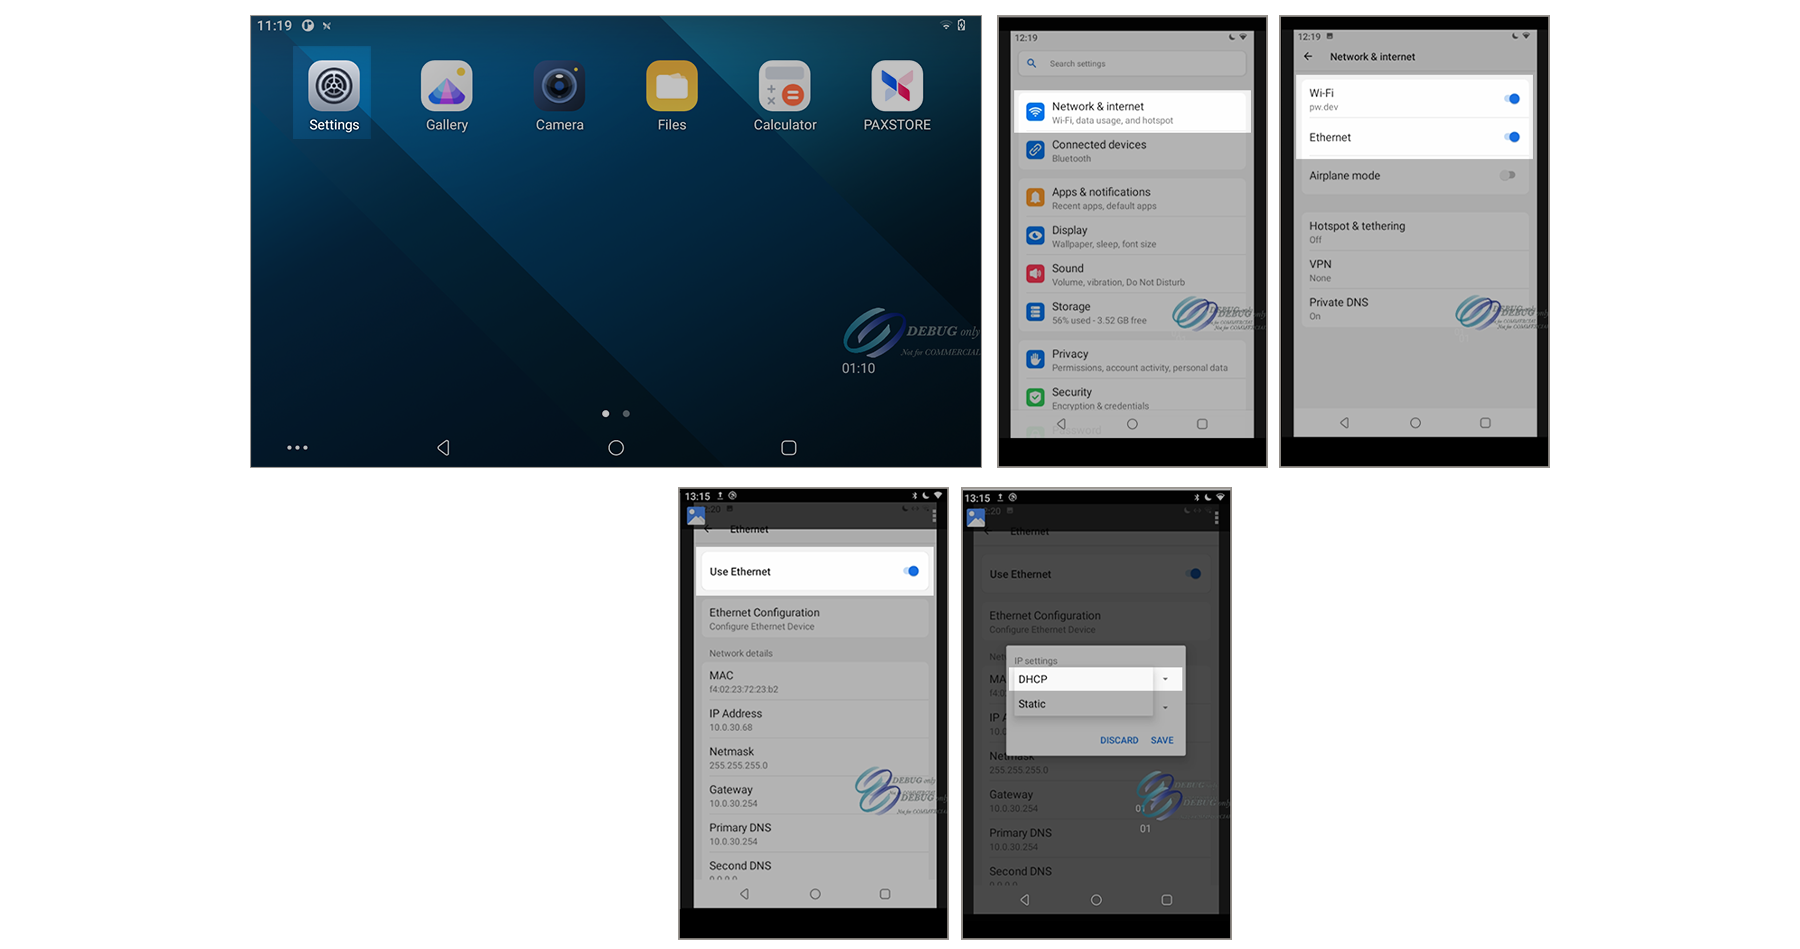
Configuring an Ethernet Dynamic IP Connection on the PAX Terminal

Use the information in this section to configure an Ethernet Dynamic Host Configuration Protocol (DHCP) IP connection on the PAX A35 terminal. This connection is also called a
dynamic IP connection
. When this type of connection is enabled, your payment terminal is automatically assigned an IP address by your network service provider each time it connects to the internet.

Enable an Ethernet Dynamic IP Connection on the PAX Terminal

To enable an Ethernet IP connection, use an Ethernet cable to connect your PAX A35 terminal to your point-of-sale (POS) system. For more information, see Connect the Ethernet Cable to the PAX Terminal.

Figure:

Settings Menu Screens Used to Enable an Ethernet Dynamic IP Connection on PAX Terminal
Settings Menu Screens Used to Enable an Ethernet Dynamic IP Connection on
                        PAX Terminal
Follow these steps to enable the Ethernet Dynamic IP connection on the PAX terminal.
  1. On the terminal Home screen, tap the
    Settings
    icon. Enter your password. The Setting screen appears. If you have not created a custom password, see Create a Password for the PAX Terminal Settings Menu.
  2. Tap
    Network & internet
    .
  3. In the
    Ethernet
    section, tap the toggle to turn on Ethernet.
  4. Tap the
    Ethernet
    icon. The Ethernet network connection settings screen appears.
  5. Scroll down and then tap
    Ethernet Configuration
    . A pop-up menu appears.
  6. Choose
    DHCP
    .
  7. Leave the Proxy type set to
    None
    . This setting is the default.
  8. Tap
    Save
    . Network details, including IP address, Gateway, and DNS, appear on the terminal screen.
  9. Use the IP address that is shown on the terminal screen in your POS system.
  10. To exit the screen, tap the back arrow until you reach the Home screen.