![[CyberSource logo]](images/cybslogo.gif)
Search documentation:
|
|
Search documentation: |
| Help Advanced | |
| Published 08/06/2002 |
|
Chapter 3
Using Risk Manager Plug-Ins
This chapter explains how to create settings groups for Risk Manager plug-ins. It also describes the following Risk Manager plug-ins and explains how to use them in your strategies:
- AddFields: Adds fields to a transaction
- EmailAction: Sends email
- ListCheck: Checks your positive and negative hotlists
- VelocityCheck: Checks order velocity
- VelocityInsert: Adds transactions to the velocity table
Information about other plug-ins, including the ICS/CPM Plug-In and the Payer Authentication Plug-In, is available in separate guides. If you purchased these plug-ins, these guides are included on your installation CD.
Note Your license may not support all of these plug-ins. See Updating the License for more information.
Creating Plug-In Settings Groups
Most plug-ins require you to configure them before you use them. For example, if you use the hotlist plug-in, you must choose which hotlist checks to perform.
To configure a plug-in, you create a plug-in settings group. You can create more than one settings group for each plug-in, then use different settings in different strategies or different parts of a single strategy.
- On the business home page, click "Manage plug-in settings."
- The Plug-In Settings page opens.
- Click Create Plug-In Settings Group.
- The Create Plug-In Settings Group page opens.
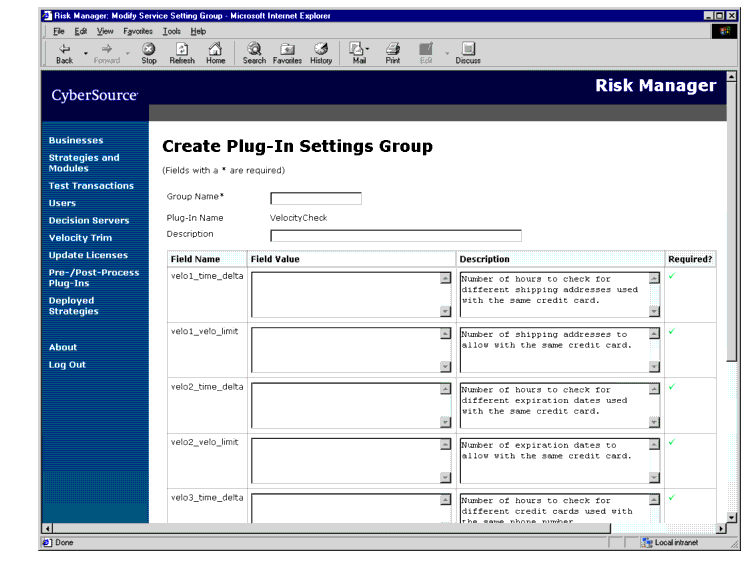
- Type a name and description for the settings group.
- Type the appropriate settings for your plug-in.
Note If the Required column for a field is checked, make sure you type a value for the field.
- Click Save Plug-In Settings Group.
- Risk Manager saves the new settings group.
Editing Plug-In Settings Groups
You can edit any existing plug-in settings group.
Important If you change a settings group used in a strategy that has been deployed, your changes will not be used until you redeploy the strategy. Also, if you change a settings group used by a pre-process or post-process plug-in, you must remove the plug-in, then add it back to the list.
- On the business home page, click "Manage plug-in settings."
- The Plug-In Settings page opens.
- Click the name of the settings group to modify.
- The Modify Plug-In Settings Group page opens.
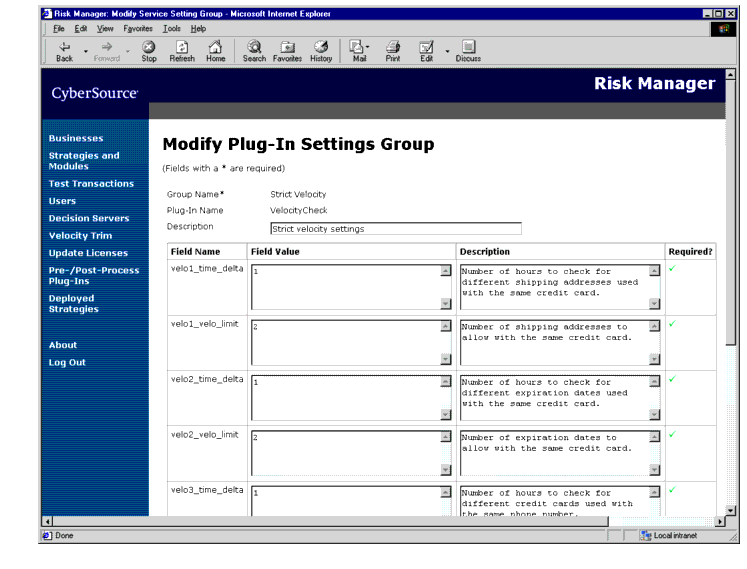
- Change the description and settings as necessary, then click Save Plug-In Settings Group.
- Risk Manager saves your changes.
Deleting Plug-In Settings Groups
If a plug-in settings group is not being used in a strategy or module, you can delete it. Otherwise, you must remove it from all strategies and modules before you delete it.
- On the business home page, click "Manage plug-in settings."
- The Plug-In Settings page opens.
- Click the name of the settings group to delete.
- The Modify Plug-In Settings Group page opens.
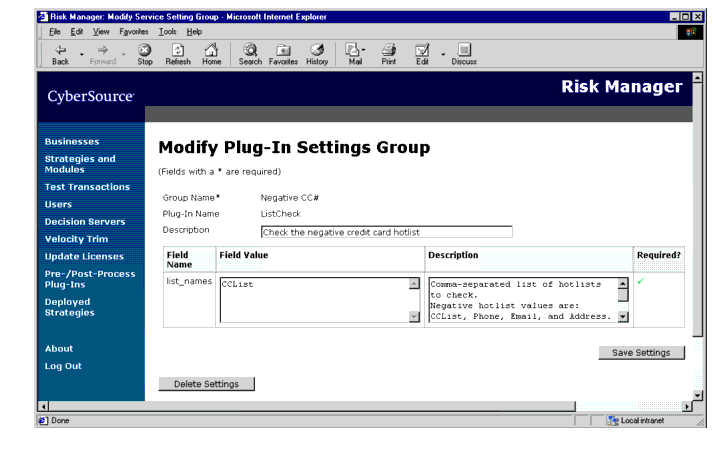
- If the settings group is not in use, click Delete Settings.
- Risk Manager deletes the settings group.
- If the settings group is in use, Risk Manager lists the strategies and modules that use the settings group.
- Because the settings are shared by the strategies and modules, you must open each strategy and module, remove the plug-in call that uses the settings group, and save your changes. Then you can delete the settings group.
Pre-Process and Post-Process Plug-Ins
Risk Manager allows you to run plug-ins at the beginning or end of every transaction. This enables you to add new features to Risk Manager without requiring you to change your business strategies.
Plug-ins that run at the beginning of every transaction are called pre-process plug-ins. Plug-ins that run at the end of every transaction are called post-process plug-ins.
To configure these plug-ins, you modify settings on your Decision Server. These settings apply to all of the strategies on that server, even those that were already deployed.
Adding Pre-Process or Post-Process Plug-Ins
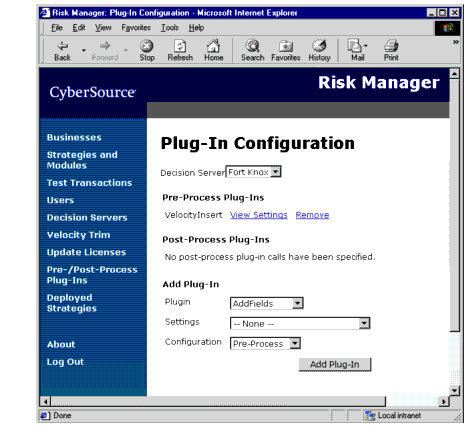
- To view configuration information for a different Decision Server than the default, choose the server from the Decision Server list.
- Risk Manager shows the information for the Decision Server.
- In the Plugin list, choose the name of the plug-in to add.
- In the Settings list, choose which group of plug-in settings to use.
- In the Configuration list, choose whether to add the plug-in as a pre-process plug-in or a post-process plug-in.
- Click Add Plug-In.
- Risk Manager adds the plug-in to the list.
Viewing Plug-In Settings
You can view the plug-in settings being used by any of your pre-process or post-process plug-ins.
- On the left navigation bar, click Pre-/Post-Process Plug-Ins.
- The Plug-In Configuration page opens.
- To view configuration information for a different Decision Server than the default, choose the server from the Decision Server list.
- Risk Manager shows the information for the Decision Server.
- Find the plug-in whose settings you want to view, then click View Settings.
- Risk Manager displays the settings used by the plug-in.
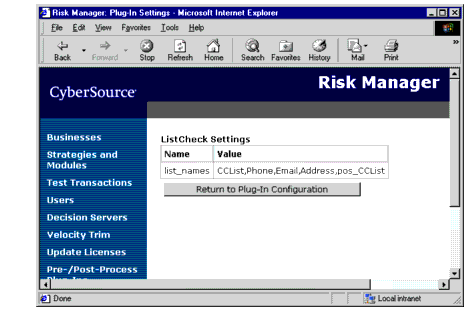
Removing Pre-Process or Post-Process Plug-Ins
- On the left navigation bar, click Pre-/Post-Process Plug-Ins.
- The Plug-In Configuration page opens.
- Find the plug-in that you want to remove, then click Remove.
- Risk Manager removes the plug-in from the pre-process or post-process list.
AddFields Plug-In
The AddFields plug-in adds or modifies fields in a transaction. You can add or modify more than one field at once.
Note A decision point or module return point can also add a single field to a transaction. See Adding Decision Points and Adding Module Return Points for more information.
Some plug-ins work differently based on which fields are in the transaction. By using the AddFields plug-in to change fields in the middle of a strategy, you can change the behavior of other plug-ins.
Configuring AddFields
The AddFields plug-in uses the following settings.
Table 4 AddFields SettingsUsing AddFields
After you create a settings group for AddFields, you can use it anywhere in your strategy. You can also use it as a pre-process or post-process plug-in.
EmailAction Plug-In
The EmailAction plug-in enables you to send email based on the outcome of a rule. For example, you could send email to your order review team every time an order is marked for review, or you could send email to a fraud analyst every time an order fails the velocity check.
The email message can include any information from the order. For example, you can include the order number so that the reviewer can quickly locate the order.
Configuring EmailAction
The EmailAction plug-in uses the following settings.
Table 5 EmailAction SettingsUsing EmailAction
After you create a settings group for EmailAction, you can use it anywhere in your strategy.
To send email if a transaction is marked for review, add the EmailAction plug-in before the REVIEW decision point.
To send email based on a rule, add the EmailAction plug-in on the rule's true or false branch.
You can also use EmailAction as a pre-process or post-process plug-in.
ListCheck Plug-In
The ListCheck plug-in checks a transaction against your positive and negative hotlists. It creates reply fields that indicate whether any information appeared on a hotlist.
Important The ListCheck plug-in does not automatically mark a transaction for review if it matches your negative hotlist. You must create rules in your strategy to interpret the reply fields from the ListCheck plug-in.
Before you use the ListCheck plug-in, you must add information to your business' hotlists. See Creating Hotlists for more information.
Configuring ListCheck
The ListCheck plug-in uses the following settings.
Table 6 ListCheck SettingsUsing ListCheck
After you create a settings group for ListCheck, you can use it anywhere in your strategy. You can also use ListCheck as a pre-process plug-in.
Your strategies must include rules that evaluate the reply fields for ListCheck. For example, to check whether a transaction matched any of the negative hotlists, you could use the following rule:
(listcheck_Address_result == "true") OR (listcheck_CCList_result == "true") OR (listcheck_Email_result == "true") OR (listcheck_Phone_result == "true")Important The ListCheck plug-in does not automatically mark a transaction for review if it matches your negative hotlist.
Table 7 shows the reply fields that ListCheck can return. If you do not enable a hotlist check, ListCheck does not return the reply field for that check.
Table 7 ListCheck Reply FieldsVelocityCheck Plug-In
The VelocityCheck plug-in checks if a single credit card number is being used with multiple addresses or expiration dates, or if a single address or phone number is being used with multiple credit cards. If this occurs within a time period that you specify, the VelocityCheck plug-in creates reply fields that indicate which velocity checks were triggered.
Important If you use the VelocityCheck plug-in, you must also use the VelocityInsert plug-in. See VelocityInsert Plug-In for more information.
The VelocityCheck plug-in does not automatically mark a transaction for review if a velocity check is triggered. You must create rules in your strategy to interpret the reply fields from the VelocityCheck plug-in.
Configuring VelocityCheck
The VelocityCheck plug-in uses the following settings.
Table 8 VelocityCheck SettingsUsing VelocityCheck
After you create a settings group for VelocityCheck, you can use it anywhere in your strategy. You can also use VelocityCheck as a pre-process plug-in.
Your strategies must include rules that evaluate the reply fields for VelocityCheck. For example, to check whether a transaction triggered any of the velocity checks, you could use the following rule:
(velocitycheck_velo1_result == "true") OR (velocitycheck_velo2_result == "true") OR (velocitycheck_velo3_result == "true") OR (velocitycheck_velo4_result == "true")Important The VelocityCheck plug-in does not automatically mark a transaction for review if it triggers a velocity check.
Table 9 shows the reply fields that VelocityCheck can return.
Table 9 VelocityCheck Reply FieldsVelocityInsert Plug-In
The VelocityInsert plug-in adds a transaction to your velocity database. If you use the VelocityCheck plug-in, you must also use VelocityInsert.
To use VelocityInsert, add it as a pre-process plug-in. Do not use it in your strategies. The VelocityInsert plug-in does not have any configuration settings.
| Copyright © 2002 CyberSource Corporation. |