![[CyberSource logo]](images/cybslogo.gif)
Search documentation:
|
|
Search documentation: |
| Help Advanced | |
| Published 08/06/2002 |
|
Chapter 5
Configuring and Maintaining Risk Manager
This chapter explains how to configure and maintain a Risk Manager server.
Adding Users
When you install Risk Manager, one user, called
admin, is created on the Administration Server. You can add more users as necessary.
- In the left navigation bar, click Users.
- The User Administration page appears.
- Click the Add User button.
- The Add User page appears.
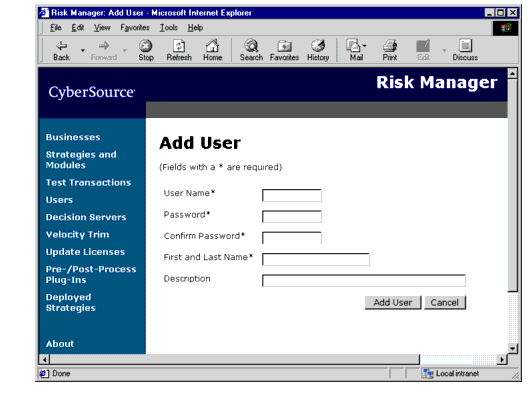
- Type the appropriate information for the user, then click Add User.
- Risk Manager adds the user and returns you to the User Administration page.
Modifying Users
After you create users, you can deactivate them, change their passwords, or update their descriptions. You cannot delete users or change their user names.
- In the left navigation bar, click Users.
- The User Administration page appears.
- Click the name of the user to modify.
- The Edit User page appears.
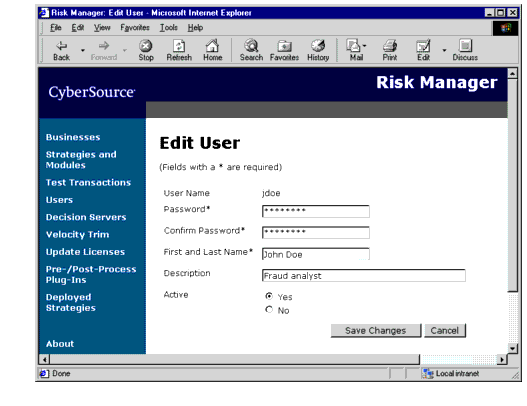
- Update the user's information as necessary, then click Save Changes.
- Risk Manager saves your changes and returns you to the User Administration page.
Updating the License
Risk Manager uses a license key to control which features you can use.
Your company receives a license key when it purchases Risk Manager. If you purchase additional features, or if you used a trial license to install Risk Manager, you can update the license key.
Note The Administration Server allows you to use all features in your strategies, regardless of whether your license supports them. However, you cannot deploy a strategy unless the Decision Server's license includes all of the features in the strategy.
You must install the license on each Decision Server that you run. You can then use the Administration Server to view a Decision Server's license information and see which features it supports.
The following table describes each feature that a Risk Manager license can include.
Table 10 Risk Manager Licensed Features
- On the left navigation bar, click Update Licenses.
- The Update License page opens. The page shows license information for the first Decision Server alias.
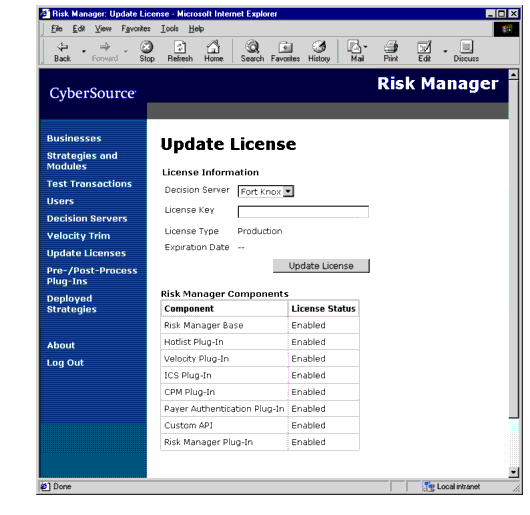
- If you want to view license information for a different Decision Server, choose a different server from the Decision Server list.
- The page updates the license information.
- In the License Key box, type the new license key.
- Click Update License.
- The Decision Server's license is updated. Risk Manager displays information about the updated license.
Exporting a Strategy
If you want to create a backup copy of a strategy, or if you want to copy a strategy from one Administration Server to another, you can export the strategy to a file.
Note You can only export deployable strategies.
When you export a strategy, you also export all of the modules and plug-in settings that the strategy uses. If you import the strategy into an Administration Server, Risk Manager imports the modules and plug-in settings as well.
If a strategy contains an incomplete module, you cannot export the strategy.
- On the left navigation bar, click Businesses.
- The Choose a Business page opens.
- Click the name of the business that contains the strategy you want to export.
- The home page for the business opens.
- Find the version of the strategy to export. In the Action column for that version, click Export.
Note If the Export link is not available, you must edit your strategy so that it is deployable. A strategy is deployable when it does not contain any Unspecified points or incomplete modules.
- Your browser prompts you to save the strategy file. Click OK, then choose a location to save the file.
Trimming the Velocity Database
You should periodically trim old records from the Decision Server's velocity database to reduce its size.
Work with your database administrator to decide how often to trim the velocity database. If your transaction volume is very high, you may need to trim the velocity database frequently. In general, you do not need to keep velocity records for more than seven days.
- On the left navigation bar, click Velocity Trim.
- The Velocity Trim page appears. The page shows velocity database information for the first Decision Server alias.
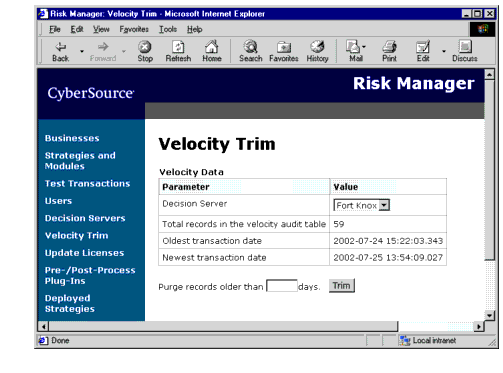
- If you want to view velocity database information for a different Decision Server, choose a different server from the Decision Server list.
- The page updates the velocity information.
- Type the number of days' worth of velocity records to keep, then click Trim.
- Risk Manager removes velocity records older than the date you specified.
Editing and Deleting Business Fields
After you add fields for your business, you can edit them to change their descriptions or data types. You can also delete business fields.
Important Do not change a field's data type or delete a field unless absolutely necessary. Changing a field's data type or deleting the field can cause problems in your strategies.
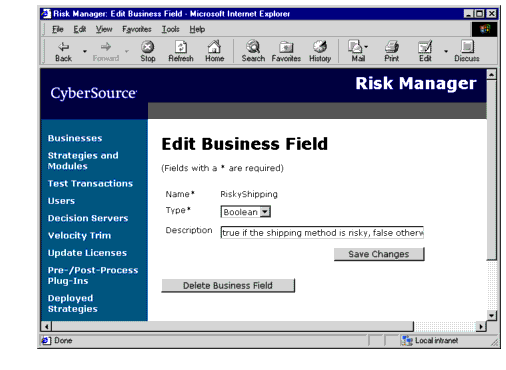
- On the business home page, click "Manage transaction fields."
- The Business Transaction Fields page opens.
- Click the name of the field you want to change.
- The Edit Business Field page opens.
Reviewing WebLogic Logs
Some types of system errors, such as database errors, may be easier to diagnose if you look at WebLogic's logs. These logs provide detailed information about server errors and Java exceptions.
For detailed information about logging, see the documentation for BEA WebLogic.
- Type the URL for your company's WebLogic server, then press Enter.
- For a regular connection, type
http://<server>:<port>/console/.- For a secure connection, type
https://<server>:<secureport>/console/.- Replace
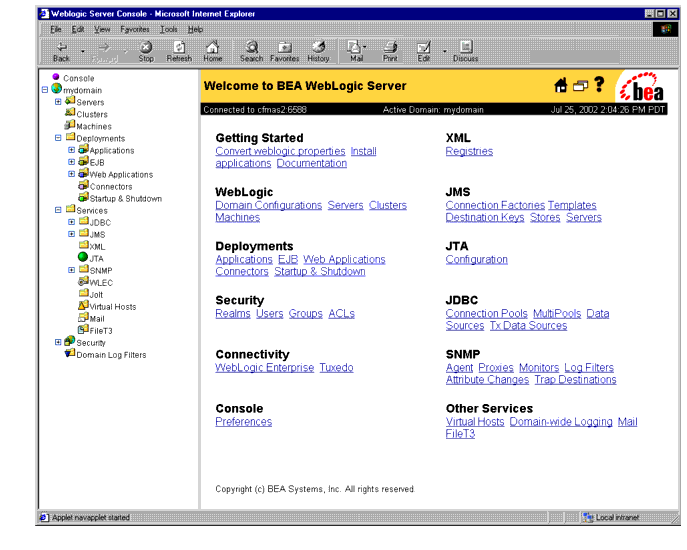
<server>with the name of your WebLogic server and<port>(or<secureport>) with the port number where WebLogic runs.- Type the user name and password for the WebLogic server administrator, then click OK.
- The WebLogic administration page opens.
- In the left navigation pane, click Servers.
- The list of servers opens.
- Right-click on the server name, then click View Server Log.
- The Search Log page opens.
- Click "Customize this view..."
- The search page opens.
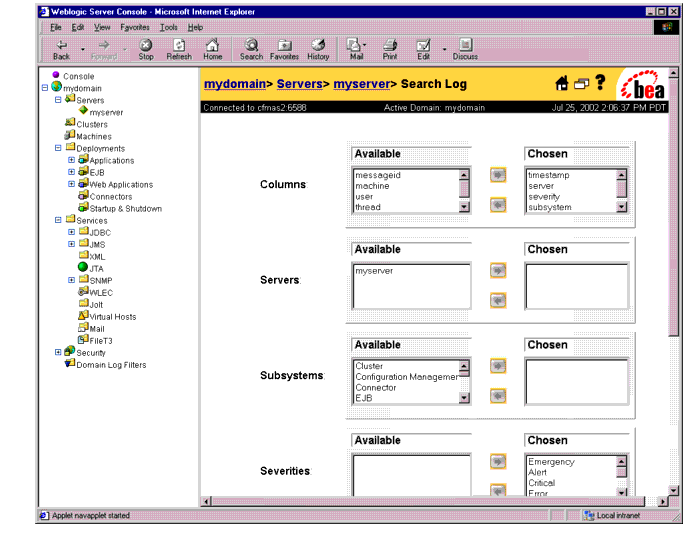
- In the Since list, choose the period of time to display.
- For example, if you know that the error occurred within the last hour, choose
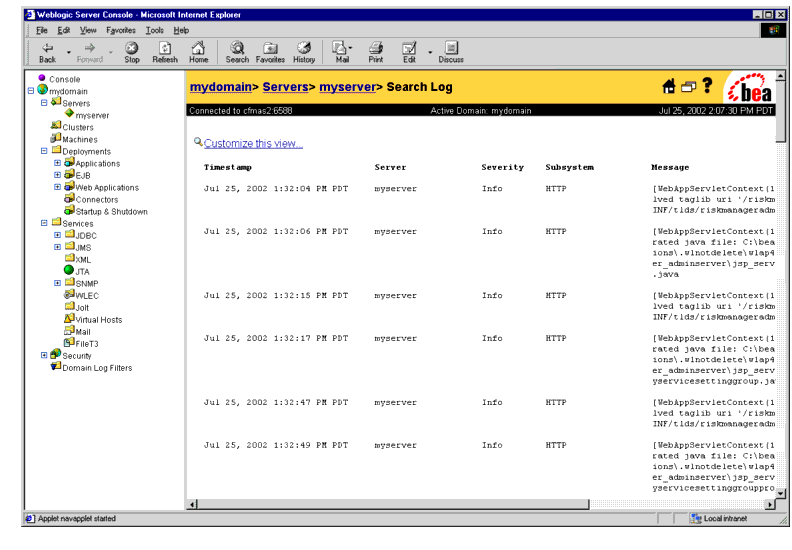
60 minutes.- Click Apply.
- The filtered list of messages appears.
| Copyright © 2002 CyberSource Corporation. |