![[CyberSource logo]](images/cybslogo.gif)
Search documentation:
|
|
Search documentation: |
| Help Advanced | |
| Published 05/15/2002 |
|
Chapter 5
Using the CCC
This chapter explains how to bring your site live, view transactions, and process orders using the CCC.
Bringing Your eCommerce Site Live
After you properly install, test, and configure the CyberSource Commerce Cartridge, you are ready to bring your site live and begin processing transactions through CyberSource.
Bringing Your eCommerce Site Live
- On the Welcome to Intershop 4 page, select the Site Administration link at the bottom right of the page.
- The Site Administration Login page appears.
- Enter the login name (the default is siteadmin) and password (the default is siteadmin), then click Login.
- The Site Administration Main Menu page appears.
- Select the Store Administration Menu link.
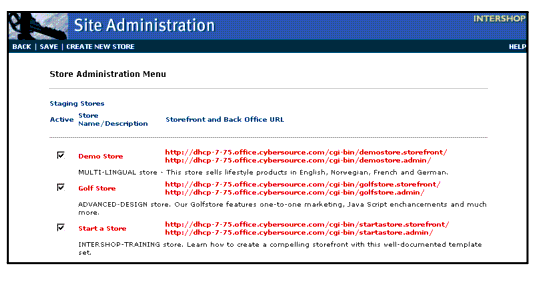
- The Store Administration Menu page appears, as shown in Figure 11.
Figure 11 Store Administration Menu Page

- In the Staging Stores list, click the name of the store you want to bring live.
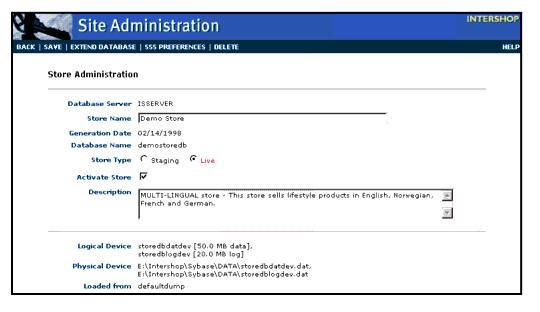
- The Store Administration page appears.
- Change Store Type from Staging to Live, as shown in Figure 14.
- Click Save.
Figure 12 Store Administration Page

- Go to CyberSource Small Business Customer Support and request to move your site live.
- Enter the Back Office of the store.
- Select the System Admin tab from the menu bar at the bottom of the page.
- The System Administration page appears.
- Select the CyberSource Configuration link.
- The CyberSource System Administration page appears.
- Verify that your Merchant ID appears in the Merchant ID field.
- Change the CyberSource Server to Production Server.
- Verify that all CyberSource settings are configured as you want.
- Click Save. You are now ready to start processing eCommerce orders through CyberSource.
Viewing Your Transactions and the Transaction Log
You can view and log the transactions processed by CyberSource. The Transaction Log tracks the score and other order data for every transaction in the eCommerce site. Enabling the Transaction Log can provide useful data when balancing your score items during setup, or when tracking errors. This section outlines the procedures for viewing your transactions and the transaction log.
Viewing Transactions
- Go to the Welcome to Intershop 4 page at the following URL:
- http://yourservername/isroot/index.html
- In your store, select Back Office.
- The Back Office page appears.
- Enter the case-sensitive log on name and password (the default for both is admin).
- Click Login.
- The Welcome to Intershop 4 Back Office page appears.
- Select the Settings Manager tab from the menu bar at the bottom of the page.
- The Settings Main Menu page appears.
- Select the CyberSource Transactions link.
- The CyberSource Transactions page appears.
- Click View, at the top of the page, to view your CyberSource transaction.
Viewing the Transaction Log
- On the Welcome to Intershop 4 page, select the Site Administration link at the bottom right of the page.
- The Site Administration Login page appears.
- Enter the login name and password (the default for both is siteadmin), then click Login.
- The Site Administration Main Menu page appears.
- Select the Database Utilities Menu link.
- The Database Utilities Menu page appears.
- Scroll down to the bottom of the page, then select the Site Log File link.
- The last 200 lines of the Site Log File appear.
Billing Completed Orders
After a customer completes an order where CyberSource services are used, payment can be authorized and captured in one step, or authorized only and then captured in the back office Use the steps outlined in this section to search for and bill completed orders.
Searching for and Bill Completed Orders
- Go to the Welcome to Intershop 4 page at the following URL:
- http://yourservername/isroot/index.html
- In your store, select Back Office.
- The Back Office page appears.
- Enter the case-sensitive log on name and password (the default for both is admin).
- Click Login.
- The Welcome to Intershop 4 Back Office page appears.
- Select the Order Manager tab from the menu bar at the bottom of the page.
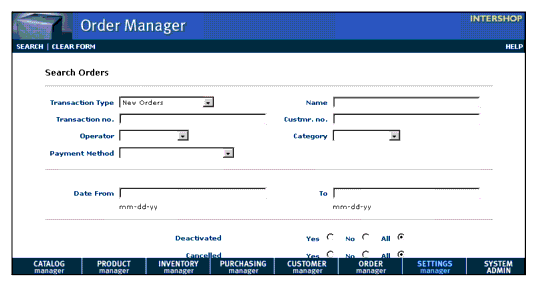
- The Search Orders page appears, as shown in Figure 15.
Figure 13 Searching for CyberSource Orders in the eCommerce Site

- In the Transaction Type box, select New Orders if you previously specified your Authorization Type as Authorization Only. Select Invoices if you previously specified your Authorization Type as Authorization & Capture.
- Click Search, at the top of the page.
- The Order List - New page appears for the Authorization Only configuration. The Invoice List page appears for the Authorization & Capture configuration.
- Select the transaction number of the transaction you want to view.
- The Customer Orders Details page appears for Authorization Only because you have not yet captured payment.
- The Invoice Details page appears for Authorization & Capture because you captured payment at the time of authorization. A check box indicates that payment was captured.
- For Authorization Only, click New Invoice at the top of the page.
- Payment is captured, then the Invoice Details page appears. A check box indicates that payment was captured.
- After you review the Invoice Details page, you can click Back, Save, Print Preview, or Cancel at the top of the page.
Checking Orders
The CyberSource transaction log stores all order information for each attempted transaction in the Intershop 4 site. To check this log for information, see Viewing the Transaction Log.
You can also review CyberSource order details on the CyberSource Web site. This is particularly useful for checking an order that failed the credit card check, but all transactions can be reviewed.
Checking Orders
- Search in the Order Manager of Intershop for the type of orders you want to review:
- Search Baskets to find incomplete transactions (non-ordered baskets)
- Search Invoices or All Orders to find completed transactions.
- (See Searching for and Bill Completed Orders to review the steps to search for an order.)
Note The order number listed on the invoice can be used for cross-referencing.
- Print the resulting list of customer names and transaction numbers.
- Point your Web browser to:
- http://icstest.ic3.com/cs/search.pl
- Enter your Merchant ID and password when prompted.
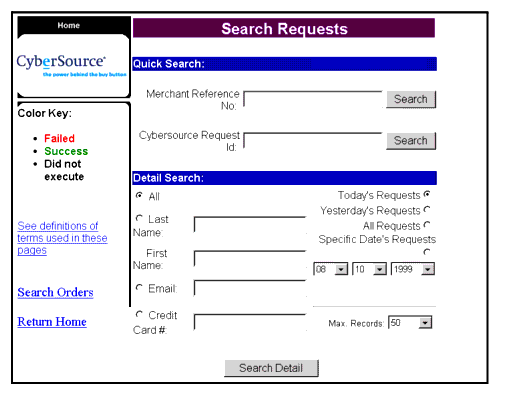
- The Support Center Search Request Web page appears, as shown in Figure 14.
Figure 14 CyberSource Support Center Search Requests Page

- Enter the customer's last name or other order details in the appropriate fields, then click Search Details.
- The details for any matching orders appear at the bottom of the page.
- The CyberSource Request ID on the invoice corresponds to the CyberSource Request ID field.
- Select a particular order to view its details.
- Regularly check the transaction log for order details.
Refunding Canceled Orders
When a customer cancels an order, you must credit the customer. See the following steps to understand how CyberSource processes a canceled order.
Canceling an Order
- Verify that the Automatically Refund check box is selected on the CyberSource System Administration page. (See Configuring the Authorization Process for more information.)
- Open a CyberSource invoice, then click Cancel at the top of the page.
- (See Searching for and Bill Completed Orders to review the steps to open an invoice.)
- If the payment was captured, it is automatically returned to the customer. If the amount was authorized only, the authorization is canceled.
Conclusion
You now are equipped with the information you need to manage your eCommerce site.
If you need further information, see CyberSource Contact Information.
| Copyright © 2002 CyberSource Corporation. |