![[CyberSource logo]](images/cybslogo.gif)
Search documentation:
|
|
Search documentation: |
| Help Advanced | |
| Published 08/08/2002 |
|
Chapter 4
Configuring WebLogic for Risk Manager
This chapter explains how to create and configure the Administration Server and Decision Server connection pools.
You will need the following information about your Administration Server and Decision Server databases to complete the procedures in this chapter:
- IP address and port number
- User name and password
- Database name (SQL Server only)
- Database system identifier, or SID (Oracle only)
Creating the Administration Server Connection Pool
To create the Administration Server connection pool, you must create a JDBC connection pool, then add a JDBC data source.
Creating a New JDBC Connection Pool
- Using a Web browser, go to
http://<servername>:<port>/console, where<servername>is the computer where BEA WebLogic is installed.- Type the BEA WebLogic administrator's user name and password, then click OK.
- The WebLogic Server Console opens.
- In the left navigation bar, click Services > JDBC > Connection Pools.
- The JDBC Connection Pools page opens.
- Click "Configure a new JDBC Connection Pool..."
- The Configuration tab opens.
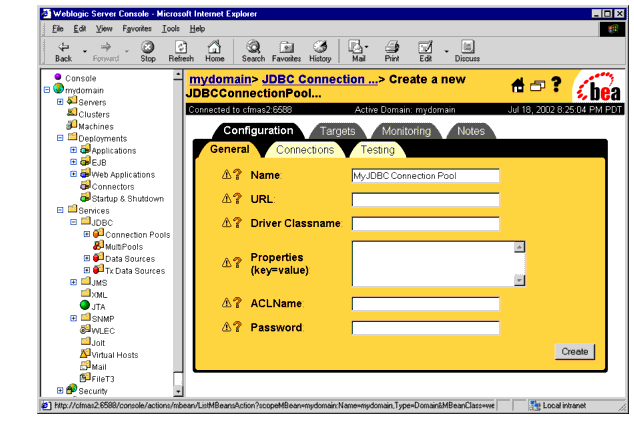
- Type the information in the form as follows.
- For SQL Server:
- Name:
AdminPool- URL:
jdbc:microsoft:sqlserver://<databaseIPAddress>:<databasePort>- Driver Classname:
com.microsoft.jdbc.sqlserver.SQLServerDriver- Properties:
user=<databaseUserName>DatabaseName=<databaseName>- ACLName:
reserve- Password:
<databasePassword>
- For Oracle:
- Name:
AdminPool
- URL:
jdbc:oracle:thin:@<databaseIPAddress>:<databasePort>:<databaseSid>- Driver Classname:
oracle.jdbc.driver.OracleDriver- Properties:
user=<databaseUserName>dll=ocijdbc8protocol=thin- ACLName:
reserve- Password:
<databasePassword>- Click Create.
- WebLogic creates the connection pool.
- Click the Testing tab.
- The Testing tab opens.
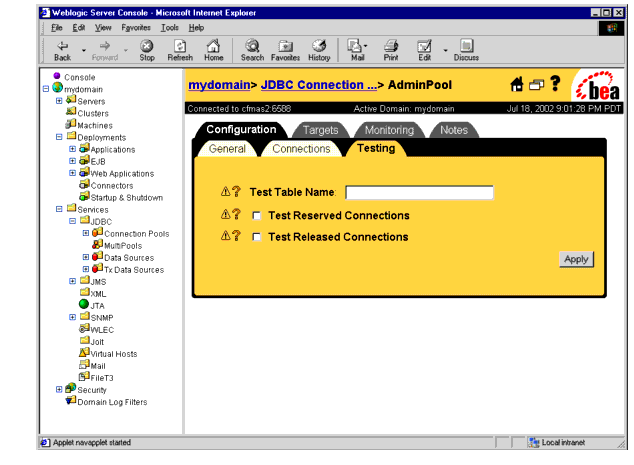
- Type the information in the form as follows.
- For SQL Server:
- For Oracle:
- Click Apply.
- WebLogic saves the settings.
- Click the Connections tab.
- The Connections tab opens.
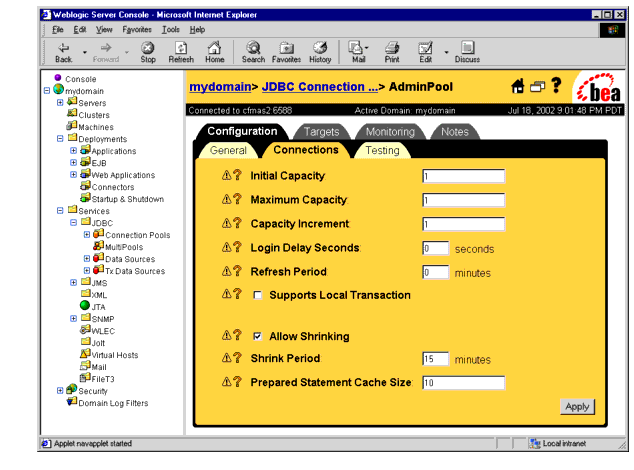
- Type the information in the form as follows.
- Initial Capacity:
4- Maximum Capacity:
20- Capacity Increment:
1- Login Delay Seconds:
1- Refresh Period:
10- Supports Local Transaction: disabled
- Allow Shrinking: enabled
- Shrink Period:
15- Prepared Statement Cache Size:
10- Click Apply.
- WebLogic saves the settings.
- Click the Targets tab.
- The Targets tab opens.
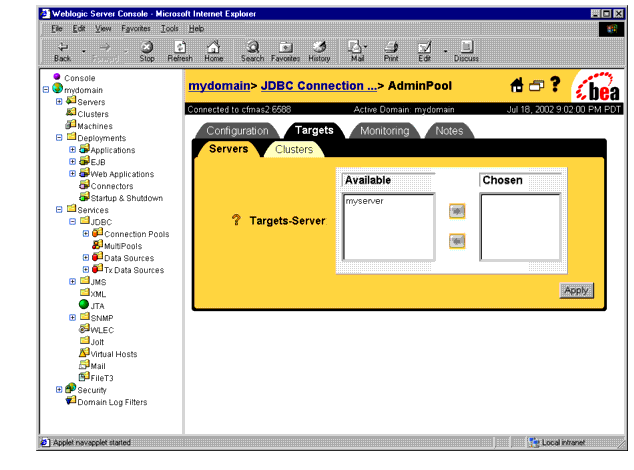
- Move the Risk Manager server from the Available list to the Chosen list, then click Apply.
- The connection pool is complete.
Creating a New JDBC Data Source
- In the WebLogic console's left navigation bar, click Services > JDBC > Data Sources.
- The JDBC Data Sources page opens.
- Click "Configure a new JDBC Data Source..."
- The Configuration tab opens.
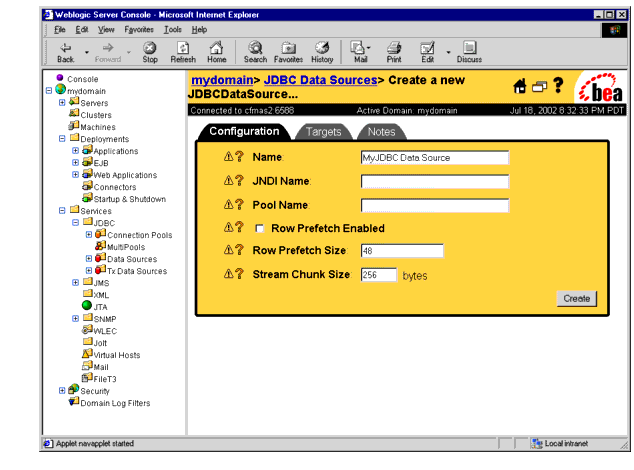
- Type the information in the form as follows.
- Name:
AdminDataSource- JNDI Name:
AdminDataSource- Pool Name:
AdminPool- Row Prefetch Enabled: disabled
- Row Prefetch Size:
48- Stream Chunk Size:
256- Click Create.
- WebLogic creates the data source.
- Click the Targets tab.
- The Targets tab opens.
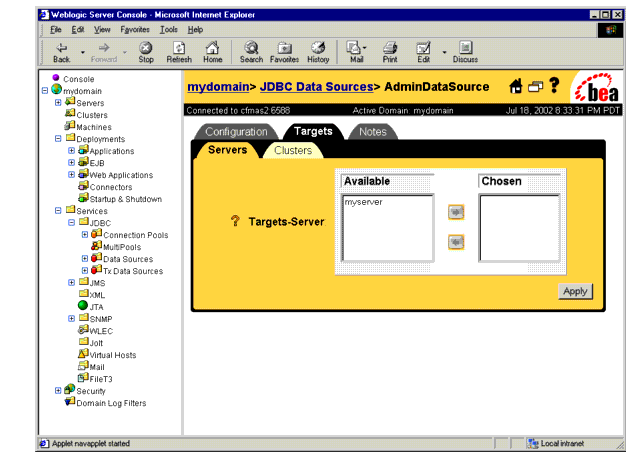
- Move the Risk Manager server from the Available list to the Chosen list, then click Apply.
- The data source is complete.
Creating the Decision Server Connection Pool
To create the Decision Server connection pool, you must create a JDBC connection pool, then add a JDBC data source.
Creating a New JDBC Connection Pool
- In the WebLogic console's left navigation bar, click Services > JDBC > Connection Pools.
- The JDBC Connection Pools page opens.
- Click "Configure a new JDBC Connection Pool..."
- The Configuration tab opens.

- Type the information in the form as follows.
- For SQL Server:
- Name:
DecisionPool- URL:
jdbc:microsoft:sqlserver://<databaseIPAddress>:<databasePort>- Driver Classname:
com.microsoft.jdbc.sqlserver.SQLServerDriver- Properties:
user=<databaseUserName>DatabaseName=<databaseName>- ACLName:
reserve- Password:
<databasePassword>
- For Oracle:
- Name:
DecisionPool
- URL:
jdbc:oracle:thin:@<databaseIPAddress>:<databasePort>:<databaseSid>- Driver Classname:
oracle.jdbc.driver.OracleDriver- Properties:
user=<databaseUserName>dll=ocijdbc8protocol=thin- ACLName:
reserve- Password:
<databasePassword>- Click Create.
- WebLogic creates the connection pool.
- Click the Testing tab.
- The Testing tab opens.
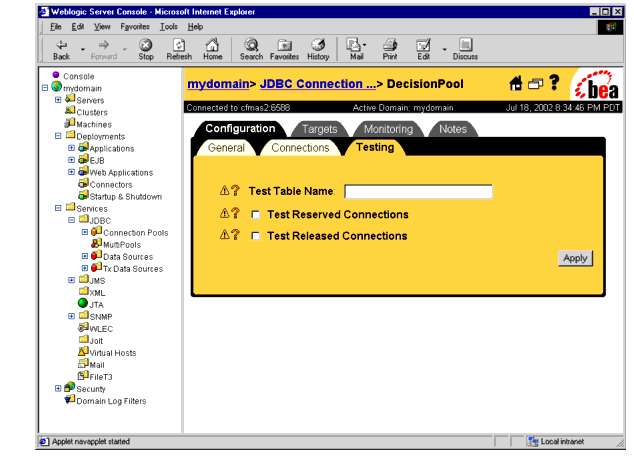
- Type the information in the form as follows.
- For SQL Server:
- For Oracle:
- Click Apply.
- WebLogic saves the settings.
- Click the Connections tab.
- The Connections tab opens.
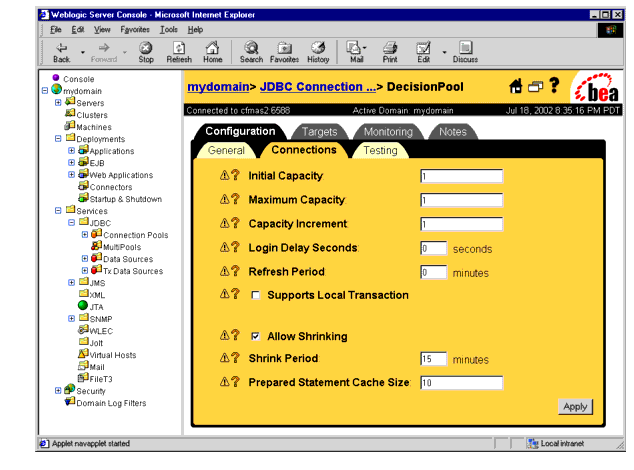
- Type the information in the form as follows.
- Initial Capacity:
4- Maximum Capacity:
20- Capacity Increment:
1- Login Delay Seconds:
1- Refresh Period:
10- Supports Local Transaction: disabled
- Allow Shrinking: enabled
- Shrink Period:
15- Prepared Statement Cache Size:
10- Click Apply.
- WebLogic saves the settings.
- Click the Targets tab.
- The Targets tab opens.
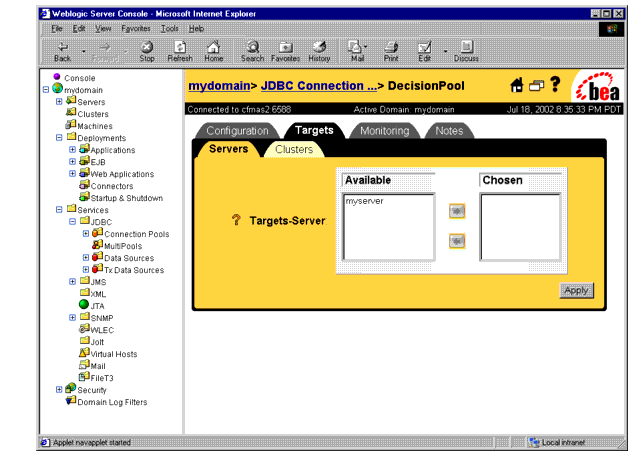
- Move the Risk Manager server from the Available list to the Chosen list, then click Apply.
- The connection pool is complete.
Creating a New JDBC Data Source
- In the WebLogic console's left navigation bar, click Services > JDBC > Data Sources.
- The JDBC Data Sources page opens.
- Click "Configure a new JDBC Data Source..."
- The Configuration tab opens.

- Type the information in the form as follows.
- Name:
RMDecisionDataSource- JNDI Name:
RMDecisionDataSource- Pool Name:
DecisionPool- Row Prefetch Enabled: disabled
- Row Prefetch Size:
48- Stream Chunk Size:
256- Click Create.
- WebLogic creates the data source.
- Click the Targets tab.
- The Targets tab opens.
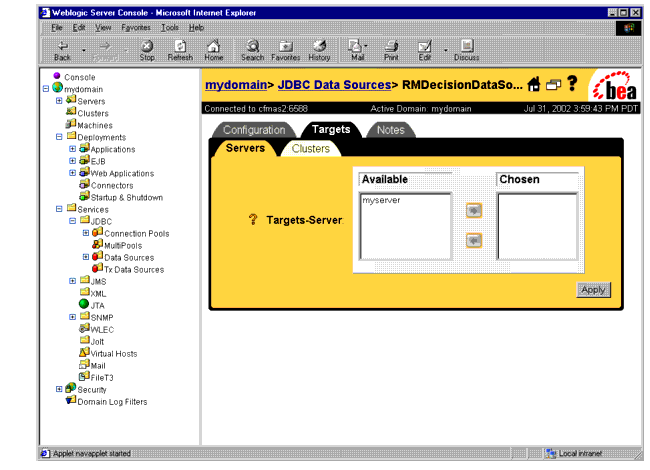
- Move the Risk Manager server from the Available list to the Chosen list, then click Apply.
- The data source is complete.
Restarting WebLogic
After you create and configure Risk Manager's connection pools, you must restart WebLogic. Risk Manager will not work correctly until you have restarted WebLogic.
| Copyright © 2002 CyberSource Corporation. |