To test the sample code provided, you must have a console application.
- Create a new application, or open your existing application in Visual Studio.
- Right-click the project node and choose WSE
Settings 3.0. The app config dialog box appears. If WSE
Settings 3.0 does not appear, proceed as follows:
- Reinstall WSE 3.0 by using the Add or Remove Programs menu.
- In the installer, select Modify and install the Visual Studio Tools option.
- Restart Visual Studio.
- Repeat Steps 1 and 2.
- In the dialog box under the General tab, check Enable
this project for Web Services Enhancements.
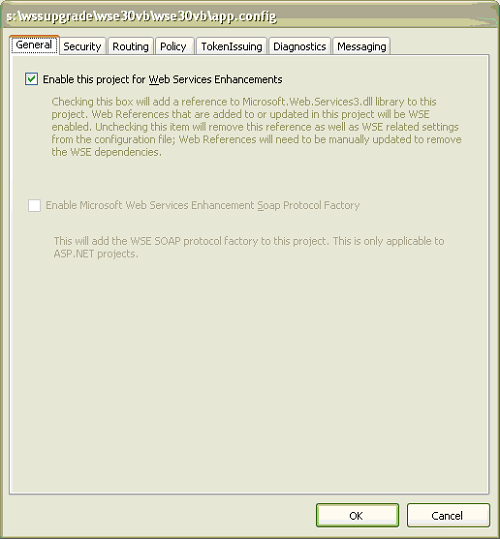
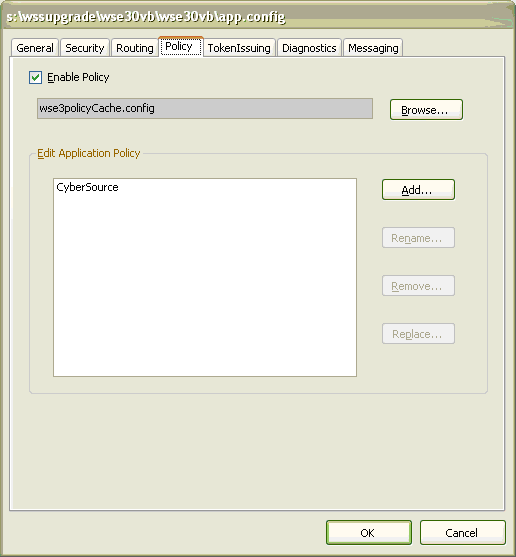
- Click the Policy tab and check Enable Policy.
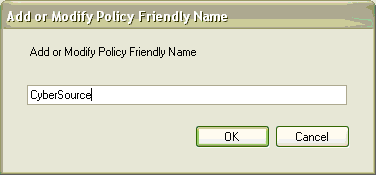
Click Add. The Add or Modify Policy Friendly
Name dialog box appears.
- In the Add or Modify Policy Friendly Name field,
enter CyberSource. If you use a name other than
CyberSource, you must modify the value of the POLICY_NAME variable
in the sample code. Click OK. The
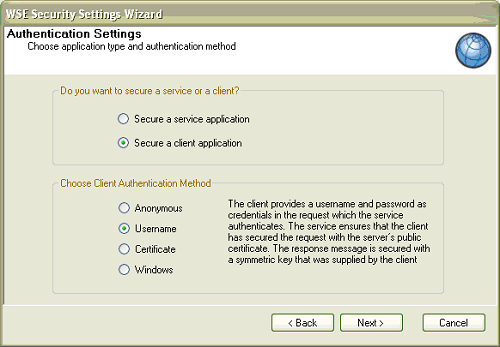
WSE Security Settings Wizard appears.
- In the Do you want to secure a service or
a client field, choose Secure a client application.
In the Choose Client Authentication Method field,
choose Username. Click Next.
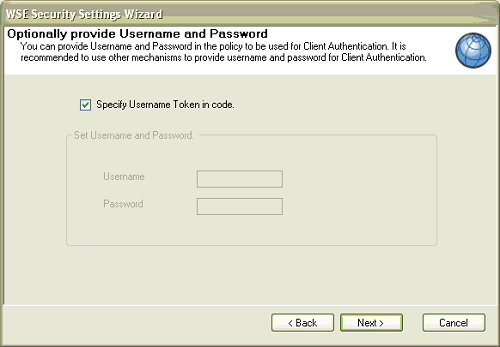
- On the next page, Specify Username Token in
code is checked by default. If you leave this default setting
your password appears as plain text in the wse3policyCache.config
policy. However, if you specify the username and password in the
code, you can retrieve the password from a database or from any
other source. Click Next.
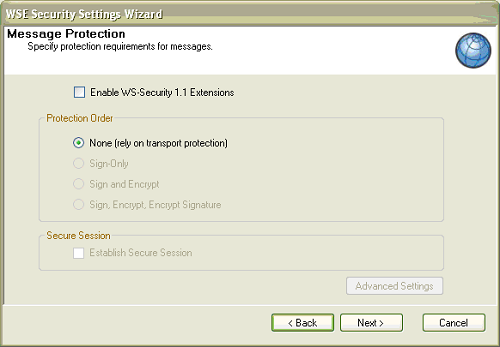
- Uncheck Enabled WS-Security 1.1 Extensions.
Unchecking this option automatically selects None (rely
on transport protection). Click Next.
- To exit the wizard, click Finish.
- To save your changes, click OK.